How to Install WordPress on Bluehost: A Complete Step-by-Step Guide
So you finally bought your domain, picked Bluehost as your host, and now you’re staring at a dashboard full of buttons wondering where the actual website part is.
That confusion is completely normal — Bluehost’s backend isn’t exactly self-explanatory if you’ve never set up a site before. The good news is, once you know how to install WordPress on Bluehost, you’ll realize it’s one of the simplest parts of the whole process.
In the next few minutes, you’ll walk through the entire setup — from logging into your account to landing on your live WordPress dashboard, ready to start building.
I’ll also cover the couple of things you should have ready beforehand so you’re not pausing halfway through to go find them. It takes less time than making a cup of coffee, and by the end, you’ll see exactly why so many beginners start here.
What You Need Before Installing WordPress on Bluehost
Before you touch anything, make sure you’ve got these ready:
- An active Bluehost hosting plan. Any tier works, since WordPress installation is included at no extra cost across all of them.
- A domain name. You can use a free domain that comes bundled with most Bluehost plans, or connect one you already own.
- Your Bluehost login credentials. You’ll need these to get into the Portal in the first place.
- A rough idea of your site’s purpose. You don’t need a finished plan, but knowing whether you’re building a blog, a business site, or a store will speed up the setup screens later.
That’s genuinely it. You don’t need coding knowledge, a separate database tool, or any third-party software — Bluehost handles the technical heavy lifting for you.
How to Install WordPress on Bluehost Through the Bluehost Portal
This is the method Bluehost recommends, and it’s what almost everyone should use unless you have a specific reason to go manual.
The whole thing runs through the Bluehost Portal, and it automates the parts that used to trip people up — like creating a database or editing configuration files by hand.
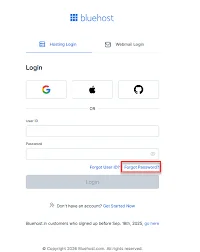
Step 1: Log In to Your Bluehost Account
Head to bluehost and click Log In in the top navigation, then enter your account credentials to access the Bluehost Portal HostAdvice. If this is a brand-new account, you’ll land on your Portal home screen right after signup — no extra steps needed.
Step 2: Create a New WordPress Website
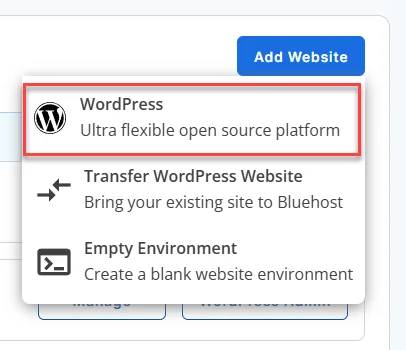
Once you’re in the Portal, click Websites in the left-side menu. Think of this as your control panel for every site tied to your account — it’s where you add, manage, or remove websites (Bluehost Help).
On the Websites page, click the Add Website button, usually found in the upper-right corner. You’ll be prompted to choose a site type — select WordPress, and Bluehost will begin installing it automatically.
You don’t need to configure a database or enter any technical details here; that part happens in the background (Bluehost Help).
Step 3: Enter Your Site Details and Admin Credentials
Once the installation finishes, Bluehost gives you two paths: AI Site Creator, for building a brand-new site from scratch, or Import an Existing WordPress Site, if you’re migrating or cloning a site you already run (Bluehost Help). If you’re starting fresh, go with AI Site Creator.
You’ll then fill in a site title, a short description, and pick a site type (blog, portfolio, business, and so on). There’s also an option to upload a logo, or click Create with AI if you don’t have one yet and want Bluehost to generate one for you.
Installing WordPress on Bluehost through this flow also asks about your experience level — Beginner, Intermediate, or Advanced — so the setup can adjust how much hand-holding it gives you afterward.
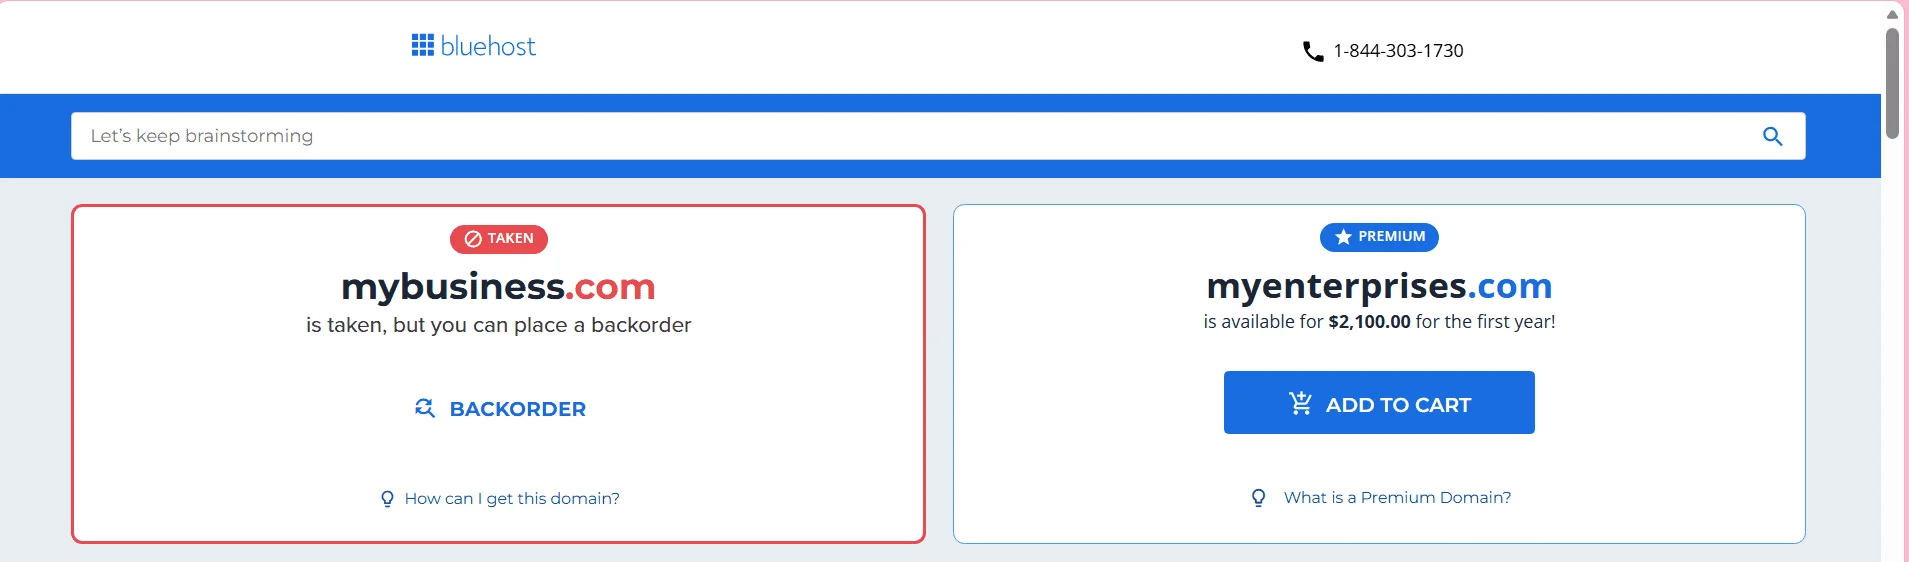
Step 4: Connect or Choose Your Domain
If you’re using a domain you already own, Bluehost will prompt you to connect it during setup so your new WordPress site points to the right address.
If you don’t have one yet, you can select the free domain included with your plan or purchase one on the spot. Either way, double-check the domain is spelled correctly here — fixing it later means waiting on DNS propagation, which can take a few hours.
Step 5: Complete the WordPress Installation
After you’ve entered your experience level, the AI Site Creator generates a handful of design templates based on what you described.
Click Preview to look through a few options, then choose one. From there, you’ll see two buttons: Save & Publish, which takes your site live immediately, or Select & Customize, which drops you into the full WordPress editor first.
Either choice lands you in your WordPress admin dashboard, and at that point, WordPress is fully installed and running on your domain.
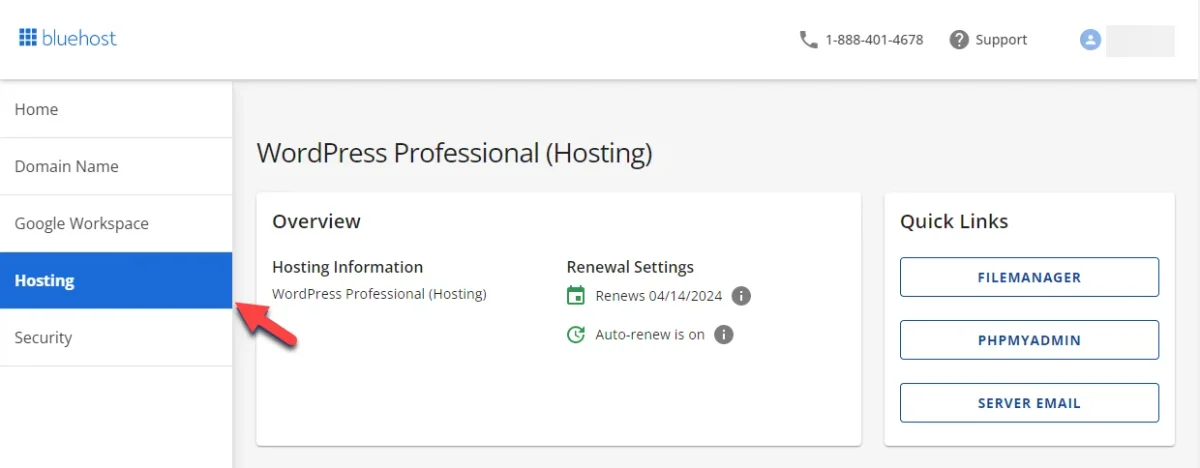
Realistically, this entire process — from login to a live dashboard — takes well under 15 minutes, most of which is just filling in text fields.
What to Do After Installing WordPress on Bluehost
Getting WordPress installed is the easy part. Here’s what actually shapes how your site looks and functions.
Choose and Customize a WordPress Theme
Your theme controls the visual layout of your entire site. You can stick with whatever the AI Site Creator generated, browse free options in the WordPress Theme Directory, or buy a premium theme if you want more design flexibility.
Go to Appearance > Themes in your dashboard to swap it out anytime — nothing here is permanent.
Install Essential WordPress Plugins
Plugins add functionality without needing you to write a single line of code. A few worth considering right away:
- A security plugin (like Wordfence) to protect against common attacks
- An SEO plugin (like Yoast SEO) to help structure your content for search engines
- A caching plugin to speed up load times
- A backup plugin (like UpdraftPlus) so you’re never starting from zero if something breaks
You can install any of these from Plugins > Add New in your dashboard.
Configure Your Site’s Basic Settings
Before you start publishing, adjust a few defaults. Go to Settings > Permalinks and switch to the “Post Name” option — it creates cleaner, more readable URLs that also help with SEO.
Then check Settings > General to confirm your timezone is correct, since it affects scheduled posts and comment timestamps.
Finally, glance at Settings > Reading to make sure “Discourage search engines from indexing this site” is unchecked once you’re ready to go public — it’s often left on by default during setup.
How to Install WordPress on Bluehost Manually
Most people never need this method — it exists mainly for developers who want direct control over file structure and database configuration, or for edge cases where the Portal’s automated installer isn’t the right fit. If that’s not you, feel free to skip straight to the FAQs.
Upload the WordPress Files
Download the latest WordPress package from wordpress.org and unzip it on your computer.
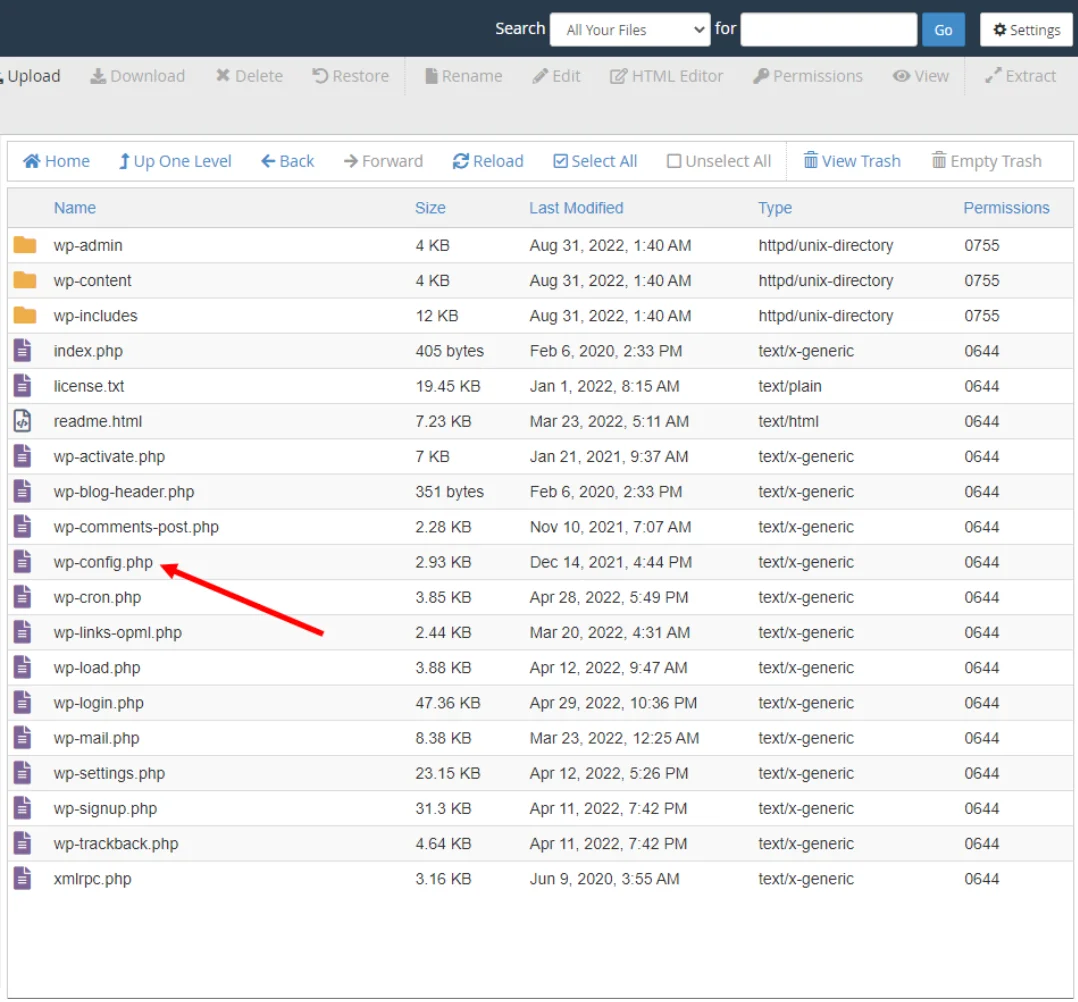
Then log into your Bluehost account, open File Manager (or use an FTP/SFTP client if you prefer), and upload the extracted files into the public_html directory — or a subfolder within it if you want WordPress installed at a specific path rather than your root domain.
Create a Database and Database User
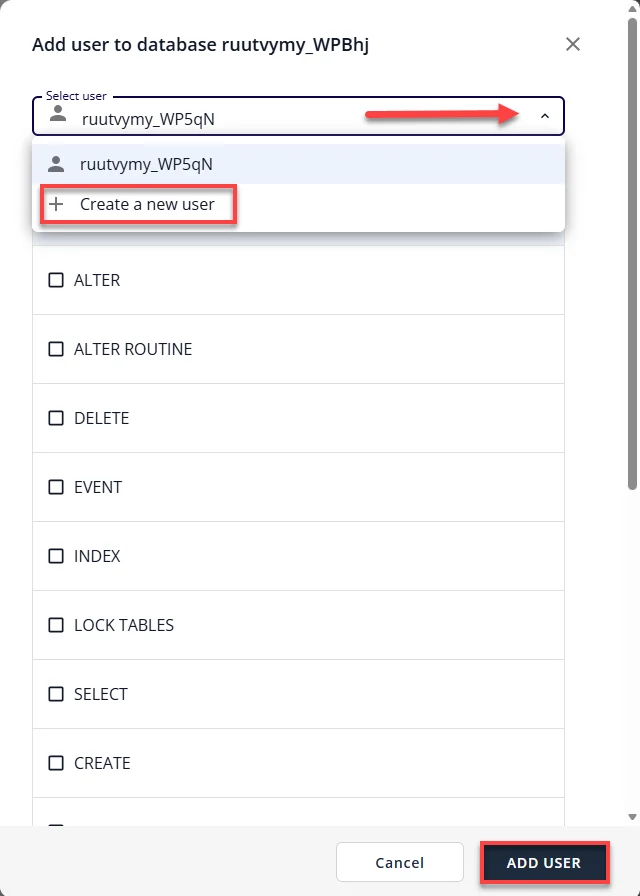
In your hosting account, open the MySQL Databases tool. Create a new database, then create a new database user with a strong password.
Add that user to the database and grant it all privileges. Write down the database name, username, and password — you’ll need all three in the next step.
Configure the wp-config.php File
Inside your uploaded WordPress files, find wp-config-sample.php and rename it to wp-config.php. Open it in File Manager’s code editor and fill in the database details you just created:
define( 'DB_NAME', 'your_database_name' );
define( 'DB_USER', 'your_database_username' );
define( 'DB_PASSWORD', 'your_database_password' );
define( 'DB_HOST', 'localhost' );
Save the file once all four values are correct.
Run the WordPress Installation
Navigate to your domain followed by /wp-admin/install.php. You’ll land on the WordPress setup screen — choose your language, then enter a Site Title, an admin Username (avoid using “admin” for security reasons), a strong Password, and your Email address.
Click Install WordPress, and once it finishes, you’ll get a login link to your new dashboard.
Common Problems When Installing WordPress on Bluehost
WordPress Installation Is Not Completing
If the installer seems stuck or times out, it’s usually a browser or connection hiccup rather than a real server error.
Clear your browser cache, refresh the Websites tab, and try the Add Website process again — Bluehost’s automated installer typically completes in a couple of minutes, so anything longer usually means it needs a fresh attempt rather than more waiting.
Domain Is Not Showing the WordPress Site
If you just connected a domain and it’s still showing an old page or a “site not found” error, this is almost always DNS propagation, not a failed installation.
Changes can take anywhere from a few minutes up to 24 hours to fully propagate, depending on your domain’s previous DNS settings. Double-check the domain is listed correctly under your Websites tab in the meantime.
Cannot Access the WordPress Dashboard
If your /wp-admin login isn’t working, first confirm you’re using the WordPress admin credentials you set during installation — these are separate from your Bluehost account login, and it’s an easy mix-up.
If you’ve genuinely forgotten them, you can reset your WordPress password directly from the Websites tab in your Bluehost Portal without needing database access.
Final Thoughts
You now know two ways to get WordPress running on Bluehost: the one-click Portal method that covers nearly everyone, and the manual route for those who want full control over the database and file setup.
For most people, the Portal is the obvious choice — it’s faster, it avoids the parts most beginners find intimidating, and it still gets you to the same place: a live, fully functional WordPress dashboard ready for your first post, page, or product.
From here, the real work — building out your content and making the site your own — is entirely up to you.
Frequently Asked Questions About Installing WordPress on Bluehost
Is WordPress Free to Install on Bluehost?
Yes. WordPress installation is included at no extra charge with every Bluehost hosting plan — you’re only paying for the hosting itself.
How Long Does WordPress Installation Take on Bluehost?
Through the Portal, the core installation typically finishes in a couple of minutes. Including the setup screens (site details, theme selection, and so on), most people are done in under 15 minutes total.
Can I Install WordPress on Multiple Bluehost Websites?
Yes, depending on your plan. Bluehost’s Basic shared hosting plan supports up to 10 websites, and higher tiers like Plus, Choice Plus, or Pro allow more (Bluehost Blog). Each one gets its own separate WordPress installation through the same Add Website process.
Can I Install WordPress Without a Bluehost Domain?
Yes. You can connect any domain you already own, even one registered elsewhere, during the setup process. You’re not required to buy or use a Bluehost-issued domain.

Alex Bryant is the founder of PvyEmpire.com and a WordPress specialist with over 4 years of hands-on experience in web hosting, performance optimization, and website management. He has extensively tested top hosting providers by setting up real websites and monitoring their speed, uptime, and reliability.
At PvyEmpire.com, Alex publishes honest, data-driven reviews, detailed guides, and verified coupons & deals. His goal is to help website owners choose the right hosting, improve performance, and grow their online presence with confidence—based on real testing, not promotions.