How To Point Namecheap Domain To Bluehost
Disclosure: This article contains affiliate links. If you purchase Bluehost through one of our links, we may earn a commission at no additional cost to you.
Your website has been on Namecheap since you bought the domain, but now your hosting is somewhere else — Bluehost — and the two aren’t even talking.
This disconnect is more common than it sounds, especially if you registered your domain years before you needed real hosting. How to point Namecheap domain to Bluehost comes down to a setting buried in a few clicks in your Namecheap account, and once changed, everything lines up.
Below, you’ll see the exact steps to connect the two — starting with what Bluehost prompts you before you click any settings, and then where to click within Namecheap.
The entire update will take a few minutes to complete, but your site won’t be up and running until the DNS is up and running everywhere. Stick to the part that most guides skip: what to do if your domain still isn’t showing the right site after a few days.

How to Point Your Namecheap Domain to Bluehost
Pointing your domain means telling Namecheap (your domain registrar) to hand off DNS control to Bluehost (your hosting provider). You do this by replacing Namecheap’s default nameservers with Bluehost’s nameservers.
A nameserver is essentially a directory that tells the internet which server holds your website’s files, so once you switch nameservers, all future visitors get routed to Bluehost instead of Namecheap’s default parking page.
Before You Start: What You Need From Bluehost
Before you touch anything in Namecheap, make sure you have:
- An active Bluehost hosting account (any plan works — shared, WordPress, or VPS)
- Access to your Namecheap account login
- Your domain already registered and visible in your Namecheap dashboard
- About 10–15 minutes for the settings change itself (propagation afterward takes longer — more on that below)
You don’t need to cancel or transfer the domain itself. Pointing a domain and transferring a domain are two different things: pointing just redirects where the DNS is managed, while the domain stays registered with Namecheap.
Bluehost Nameservers to Use
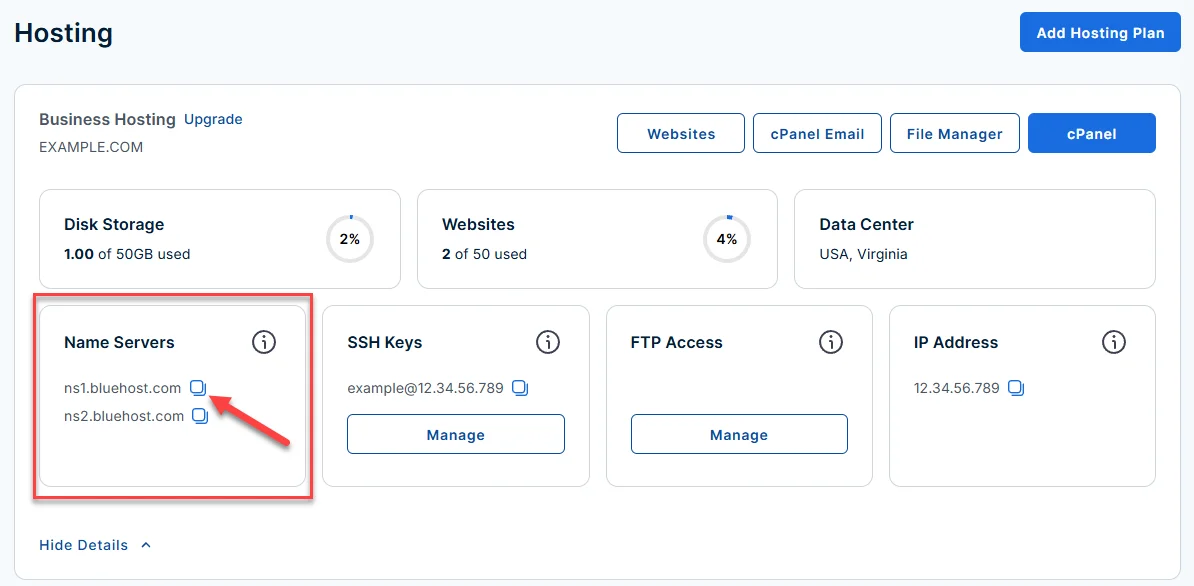
Bluehost issues two standard nameservers for most hosting accounts:
- ns1.bluehost.com
- ns2.bluehost.com
<cite index=”1-1″>These are the nameservers you specify in your domain’s DNS zone to point it to Bluehost</cite>.
If your Bluehost welcome email or hosting dashboard lists different or additional nameservers for your specific plan, use those instead — always match what’s shown in your own account over generic examples.
How to Point Your Namecheap Domain to Bluehost Step by Step
Here’s the exact path through Namecheap’s dashboard, based on Namecheap’s current account structure.
Log In to Your Namecheap Account
- Go to namecheap.com and click Sign In in the top right corner.
- Enter your Namecheap username and password.
- Once logged in, you’ll land on your account dashboard.
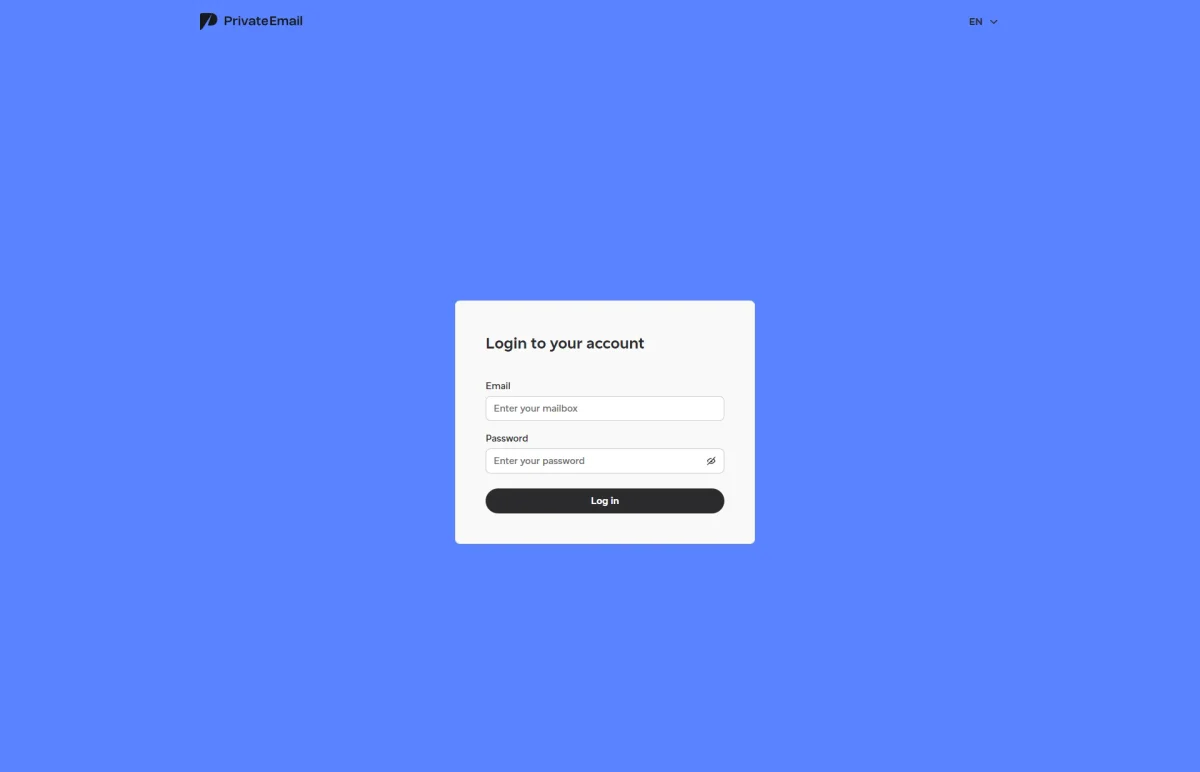
Common error: If you can’t remember which email you used to register the domain, use the “Forgot Password” link rather than creating a second Namecheap account — a duplicate account won’t show your existing domain.
Open Your Domain’s DNS Settings
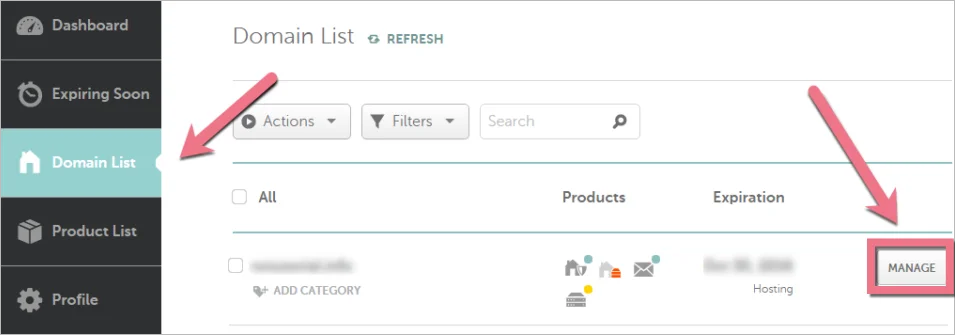
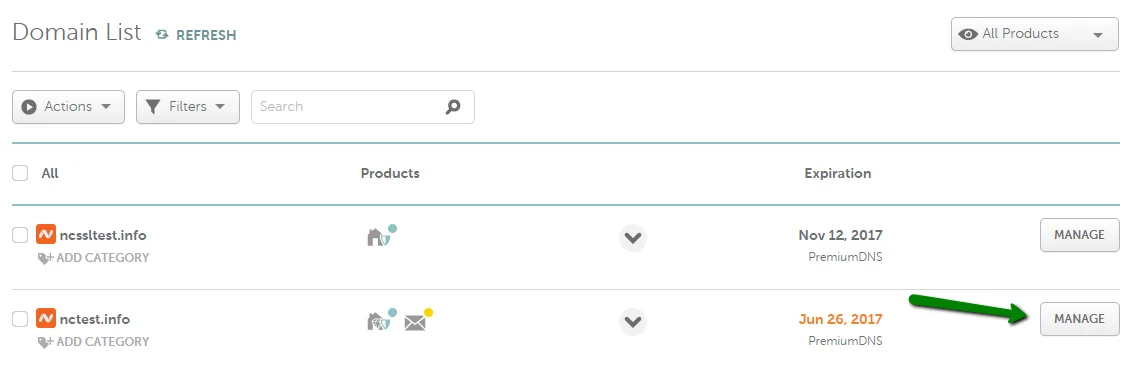
<cite index=”2-1″>After signing in, select Domain List from the left sidebar, then click the Manage button next to the domain you want to update</cite>.
- Click Domain List in the left sidebar.
- Find your domain in the list.
- Click the Manage button next to it.
Common error: If you have multiple domains and can’t find the right one, use the search bar at the top of the Domain List page rather than scrolling — Namecheap’s list doesn’t sort alphabetically by default for all accounts.
Select Custom DNS Nameservers
On the domain management page, <cite index=”2-1″>find the Nameservers section and select Custom DNS from the drop-down menu</cite>.
- Scroll to the Nameservers section.
- Click the dropdown (it usually shows “Namecheap BasicDNS” by default).
- Select Custom DNS from the list.
Common error: Selecting “Namecheap Web Hosting DNS” or “Namecheap Free CDN” by mistake instead of “Custom DNS” is common because the labels look similar — double-check the exact wording before moving on.
Enter Bluehost Nameservers
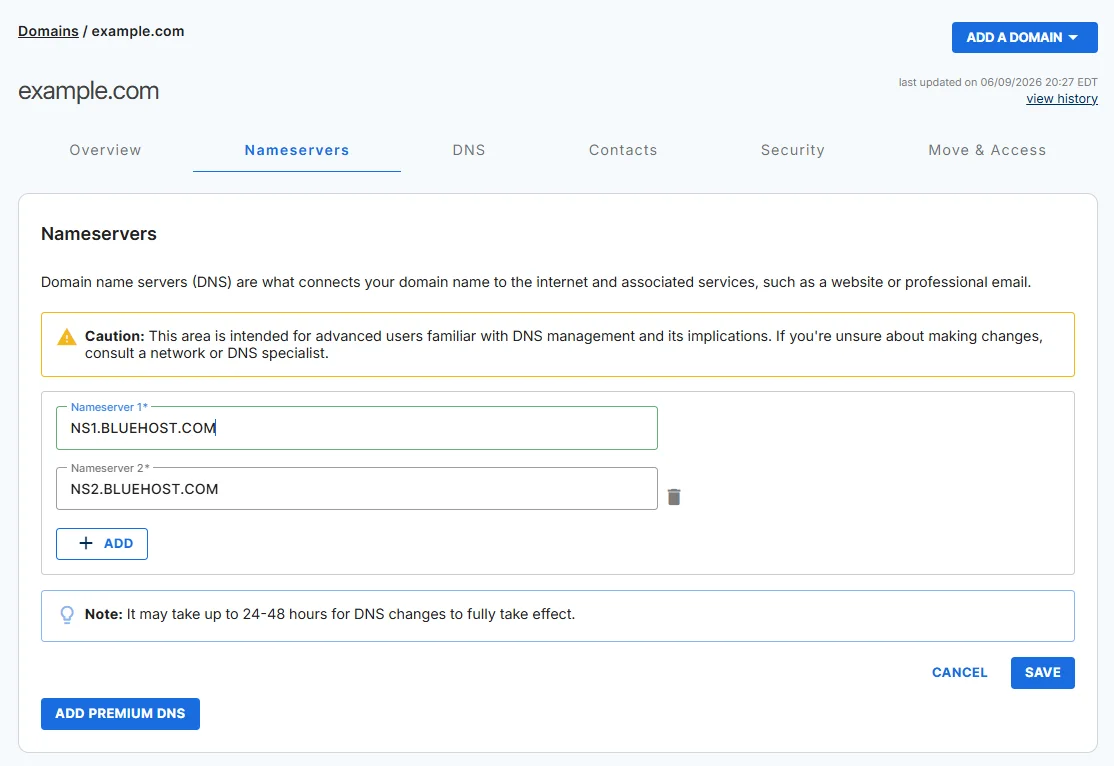
<cite index=”2-1″>Once Custom DNS is selected, enter your Bluehost nameservers one at a time, one per line</cite>:
| Field | Value |
|---|---|
| Nameserver 1 | ns1.bluehost.com |
| Nameserver 2 | ns2.bluehost.com |
Common error: Leaving a stray space before or after the nameserver text (easy to do when copy-pasting) can cause the field to reject the entry or silently fail to save. Retype the values manually if you’re unsure.
Save the Nameserver Changes
<cite index=”2-1″>When you’re finished entering the nameservers, click the green checkmark to save your changes</cite>.
- Confirm both nameserver fields are correct.
- Click the green checkmark icon next to the fields.
- Wait for the confirmation message that the update was saved.
Common error: Refreshing or navigating away from the page right after clicking the checkmark, before the confirmation message appears, can leave the change half-applied. Wait for the on-screen confirmation before closing the tab.
Nameservers vs. A Record: Which Should You Use?
Both methods point your domain to Bluehost, but they hand off different amounts of control. Changing nameservers moves all DNS management to Bluehost.
Updating an A Record (a single DNS entry that maps your domain to a specific server IP address) keeps DNS management in Namecheap and only redirects the website itself.
When to Use Bluehost Nameservers
Use the full nameserver switch if Bluehost is hosting your website, your email, and you want one place — Bluehost’s cPanel — to manage everything through its DNS Zone Editor. This is the more common setup for a straightforward migration.
When to Keep Namecheap DNS and Use an A Record
Keep your domain on Namecheap’s DNS and update just the A Record if you’re keeping email or subdomains elsewhere and only want the main website served from Bluehost. This is a narrower change and won’t affect MX (email) records you’ve already set up in Namecheap.
What Happens After You Point Your Domain to Bluehost?
Once you save the nameserver change, nothing happens instantly — DNS updates spread gradually across the internet.
DNS Propagation and How Long It Takes
<cite index=”2-1″>It typically takes 24 to 48 hours for the domain to fully propagate and resolve correctly worldwide</cite> after a nameserver update.
During this window, some visitors may briefly see the old site while others already see the new one, depending on their internet provider’s cached DNS data.
How to Check if Your Domain Is Pointing to Bluehost
- Wait at least a few hours after saving the change.
- Use a free DNS Propagation Checker tool (search “DNS checker” — several reputable free tools exist).
- Enter your domain name and look up its NS records.
- Confirm the results show ns1.bluehost.com and ns2.bluehost.com.
Check Your Website and SSL After DNS Updates
Once propagation completes:
- Load your domain in a private/incognito browser window to avoid cached results.
- Confirm your site — not a Bluehost or Namecheap placeholder page — loads.
- Check that HTTPS loads without a certificate warning; if it doesn’t, issue or reissue a free SSL certificate from your Bluehost hosting dashboard.
- Test a couple of internal links and your contact form, if you have one, to confirm nothing broke during the switch.
Troubleshooting Namecheap Domain to Bluehost Connection
Domain Still Shows the Old Website
This is almost always a propagation delay or a browser cache issue, not a mistake on your part. Clear your browser cache, try a different device or network, or wait the full 48-hour window before troubleshooting further.
Website Is Not Loading After Changing Nameservers
Double-check that the domain has been added as the primary or an addon domain (a secondary domain hosted under the same hosting account) inside your Bluehost account. A nameserver pointing to Bluehost with no matching domain setup on Bluehost’s end will fail to resolve to any site.
Bluehost Does Not Recognize the Domain
If Bluehost’s dashboard doesn’t show the domain as connected, go into Bluehost’s domain management area and add the domain manually as an addon or parked domain, matching the exact domain name (including or excluding “www” consistently).
Conclusion
Pointing a Namecheap domain to Bluehost comes down to one setting: swapping Namecheap’s default nameservers for Bluehost’s (ns1.bluehost.com and ns2.bluehost.com) under Custom DNS in your domain’s management page.
The change itself takes minutes, but give it up to 48 hours to fully propagate before assuming something’s wrong. If your site or email breaks along the way, it’s almost always a missing DNS record or a propagation delay — not a sign you need to start over.
FAQs: How To Point Namecheap Domain To Bluehost
Can You Transfer a Domain From Namecheap to Bluehost?
Yes, but that’s a separate process from pointing it. Transferring moves the domain’s registration to Bluehost; pointing only changes where DNS is managed while Namecheap stays the registrar.
How Do I Transfer My Domain to Bluehost?
You’d start the transfer from inside your Bluehost account using your Namecheap domain’s EPP/authorization code, then unlock the domain in Namecheap first. This is unnecessary if you only want to point the domain, not move ownership records.
Will I Lose My Email If I Point My Domain to Bluehost?
If your email is hosted through Namecheap’s Private Email or another third-party service, switching nameservers to Bluehost can break it unless you recreate the matching MX records inside Bluehost’s DNS Zone Editor first.
Will My Website Go Down When I Point My Domain to Bluehost?
There’s typically a short window during propagation where the site may be inconsistent for some visitors, but it shouldn’t go fully offline as long as your Bluehost hosting is already active and the domain is added there.
Is a CNAME the Same as a Redirect?
No. A CNAME record points one domain or subdomain to another domain name at the DNS level, while a redirect is a browser-level instruction that sends visitors from one URL to another. They solve different problems and aren’t interchangeable.

Alex Bryant is the founder of PvyEmpire.com and a WordPress specialist with over 4 years of hands-on experience in web hosting, performance optimization, and website management. He has extensively tested top hosting providers by setting up real websites and monitoring their speed, uptime, and reliability.
At PvyEmpire.com, Alex publishes honest, data-driven reviews, detailed guides, and verified coupons & deals. His goal is to help website owners choose the right hosting, improve performance, and grow their online presence with confidence—based on real testing, not promotions.